How to structure your LinkedIn posts to get 10x impressions?
#2 Examples of 3 posts structures that generate engagement
Hi! ✌️
Last year, I started to build my personal brand on LinkedIn. I went from ≈ 8,000 to 20,000+ followers in 1 year.
Looking back at my LinkedIn progress, there are some bad and good points:
The bad points:
I wasn’t consistent enough
I had long breaks because I lacked content ideas
I didn’t have a strategic plan
The good points:
I transformed writing into a habit
I realized the power of building your brand
I figure out what works on LinkedIn, so I can share everything with you 🙌
ℹ️ This post will take you 2 mins 22 sec to read it.
3 LinkedIn posts structures that generate engagement
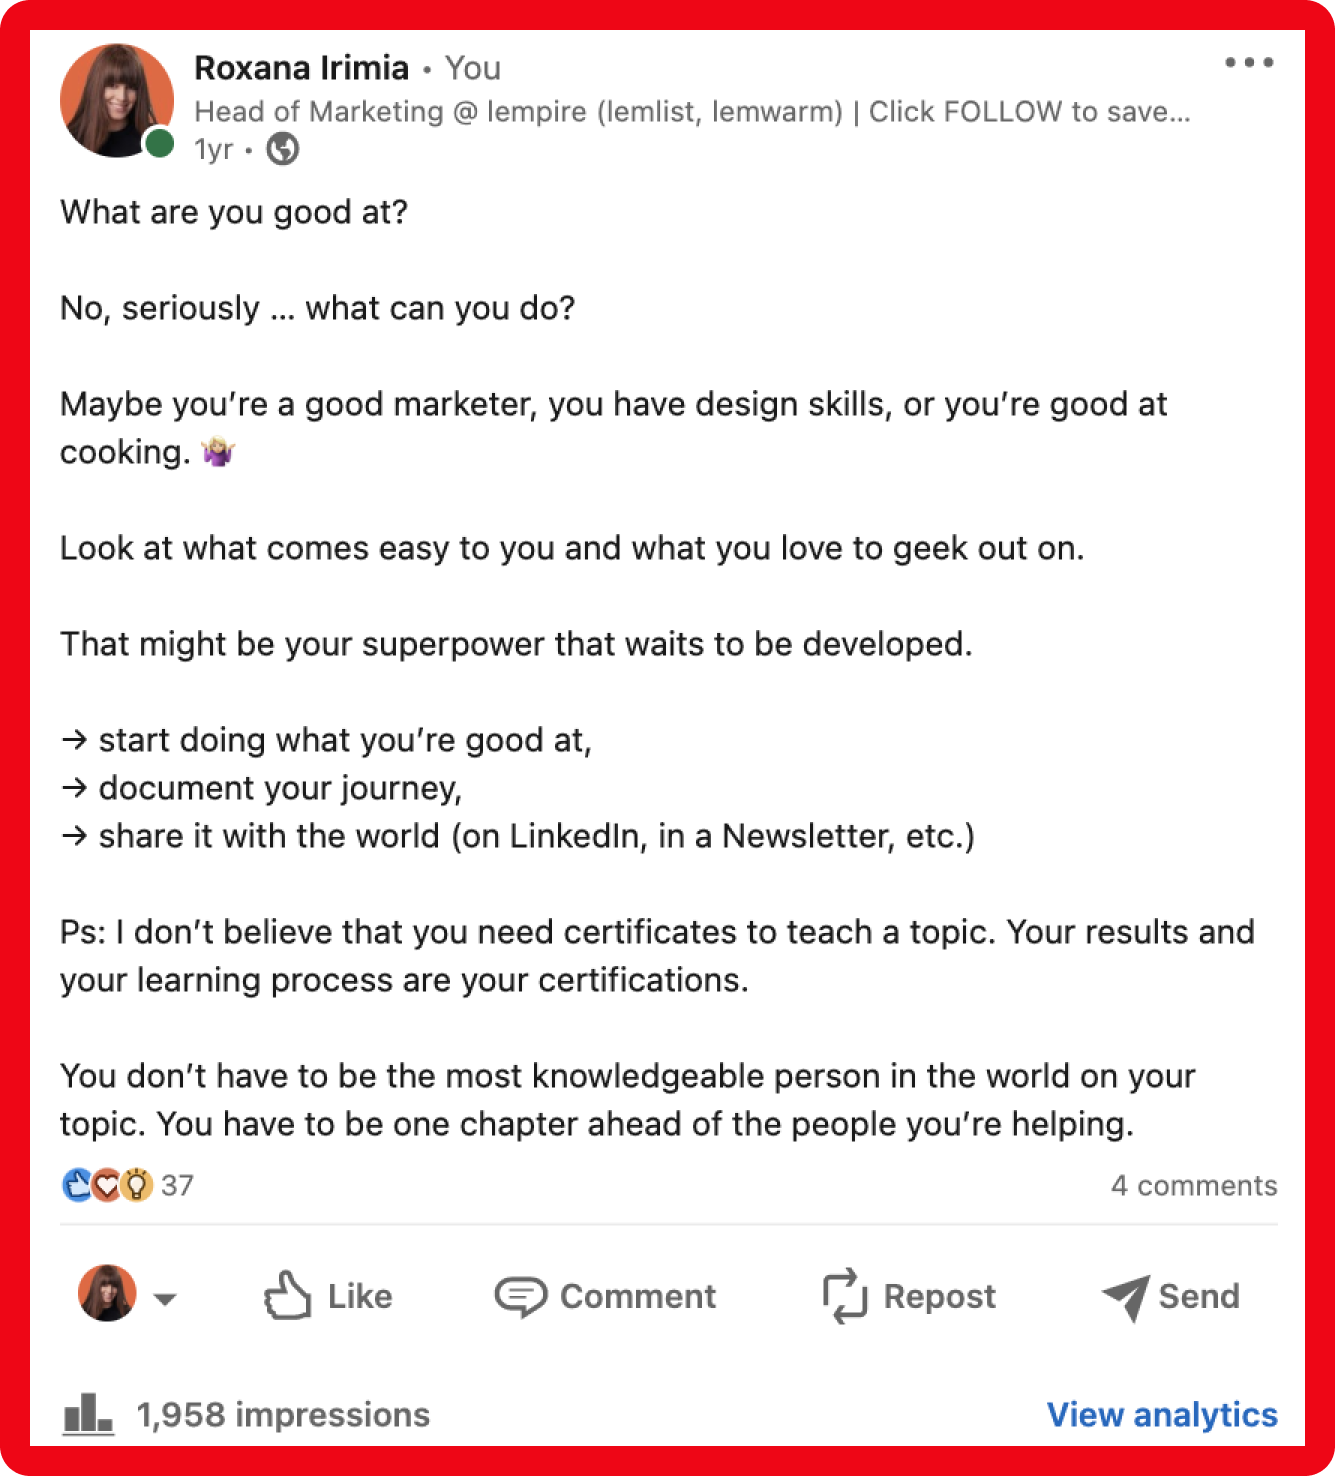
Before jumping into the structures, keep in mind that 1 year ago, I was here ⬇
Now, I use structures and post templates to share content in a very sharp + clear way and generate 12x more engagement.
How to do that for your own posts?
First, 2 things:
On LinkedIn, people don’t read. They scan - that’s why your posts should be visual.
Your structure makes the success of your post.
Think about your post on a feed as a chocolate bar on a supermarket shelf. It can be the most delicious chocolate ever, but if the packaging (aka the structure) is not catchy or easy to spot, the chances for you to buy it are small.
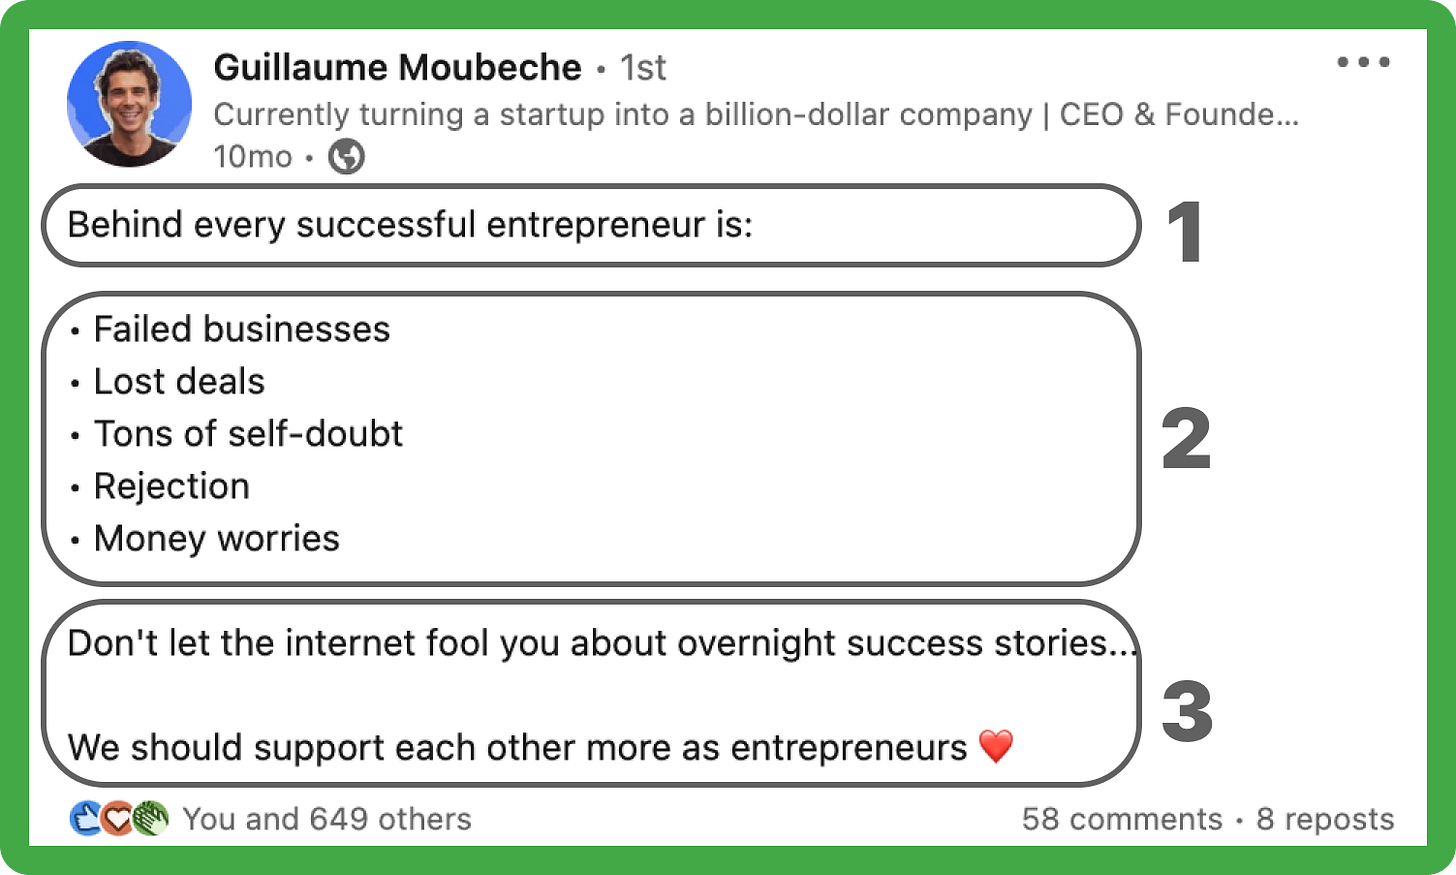
Here are 3 LinkedIn posts structures you can test + 3 examples to better get the idea.
Structure #1 → “bad versus good”
This structure is very effective, as it provides value clearly without fluff.
You start with the “bad side” so you can boost curiosity on how people can avoid it
You go with the “good side” as a way to solve the issues just mentioned in part 1
You end up the post with a sharp and crisp conclusion as a key takeaway
PRO TIP → Always add the bad-good examples, so people have real use cases of how they can apply your tips.
Structure #2 → “before and after”
This structure is very catchy visually and can generate a lot of engagement when it’s used for personal posts, as people relate very easily to these topics.
You start with how X looked like before.
E.g.:
How your life looked back in the day
How people were using LinkedIn
How people were applying for jobs, etc.
Next, you give the exact number of points, but underlying how X looks like right now
E.g.:
How your life looks now
How people are now using LinkedIn
How people are now applying for jobs, etc.
You end up with a sharp and clear conclusion.
PRO TIP → Keep your sentences 1 line long to make the post very easy to scan.
Structure #3 → “the list”
In general, lists make posts easier to read, so this structure can perform well if you stay clear and specific.
You introduce your topic with a general statement
You drop the list (use bullet points, → or numbers)
You end up with the conclusion
PRO TIP → Test out this structure for personal and motivational topics - as it’s catchy and direct, so people will relate to you without the need to read huge paragraphs about your journey/background.
And voila! If you use these structures in your next LinkedIn posts, don’t hesitate to tag me - I’m always happy to see that my tips can help you + I can engage with your posts as well 🙌
Thanks for reading.
See you next week!
Roxana


Indeed these post structures are easy to scan and easy to consume. I loved them. I will use them. Roxana!